Sunday, August 20, 2017

HP 3PAR REPLACING A FAILED DISK


Replacing a failed disk in a 3PAR is pretty simple you just need to follow a few steps to make sure you do it safely. If you are new to 3PAR or would like to learn more a good place to start is our 3PAR beginners guide
Let’s get started with the disk replacement procedure:
1 Check to see if you have any failed or degraded disks in the system. Take a note of the disk ID and cage position. In this case disk ID =26, cage position = 2:8:0
3PARSAN01 cli% showpd -failed -degraded

                           -Size(MB)-- ----Ports----

Id CagePos Type RPM State   Total Free A     B     Cap(GB)

46 2:8:0? FC   10 failed 417792   0 ----- -----     450

------------------------------------------------------------

 1 total                  417792   0
2 Check if the disk sevicemag command is running on the drive. The servicemag command is used to inform the system to evacuate all the chunklets from a drive so that it is ready for service. Below we can see the servicemag has succeeded on the drive we identified in step 1.
3PARSAN01 cli% servicemag status

Cage 2, magazine 8:

The magazine was successfully brought offline by a servicemag start command.

The command completed Thu Jul 10 20:07:03 2014.

servicemag start -pdid 46 – Succeeded
3 Next we double check there is no data left on the drive. You can do this by running showpd –space driveID as below. You need to check that all columns other than size and failed are zero
3PARSAN01 cli% showpd –space 46

Id CagePos Type -State-   Size Volume Spare Free Unavail Failed
46 2:8:0? FC   failed 417792     0                 0     0          0         417792

---------------------------------------------------------------

1 total                        417792     0            0   0          0        417792

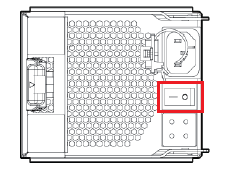
4 Next to replace the physical disk. Make sure you are happy with the above steps. Then pop that bad boy out, you will have a note of the location of the failed drive from step 1.

5 Once the disk is in you can monitor the progress of the rebuild by running servicemag status, which will give you an ETA for completion.
3PARSAN01 cli% servicemag status

Cage 2, magazine 8:

The magazine is being brought online due to a servicemag resume.

The last status update was at Thu Jun 26 12:09:19 2014.

Chunklets relocated: 73 in 50 minutes and 34 seconds

Chunklets remaining: 400

Chunklets marked for moving: 400

Estimated time for relocation completion based on 41 seconds per chunklet is: 4hours, 57 minutes and 39 seconds

servicemag resume 2 8 -- is in Progress
6 Once this is complete you can check that your disks are showing in a normal state with showpd -state
3PARSAN01 cli% showpd -state

Id CagePos Type -State- --------------------Detailed_State---------------------

43 2:5:0   FC   normal normal

44 2:6:0   FC   normal normal

45 2:7:0   FC   normal normal

46 2:8:0 FC   normal normal

47 2:9:0   FC   normal normal
That’s it, job done!

How to shutdown 3PAR

I recently did the power down of a datacentre containing a 3PAR and wanted to quickly cover off the steps that I followed to power off and then back on.
First of all I did a health check to check for any issues such as a failed disk:
3PAR1% checkhealth
 Checking alert
 Checking cabling
 Checking cage
 Checking cert
 Checking dar
 Checking date
 Checking fs
 Checking host
 Checking ld
 Checking license
 Checking network
 Checking node
 Checking pd
 Checking port
 Checking rc
 Checking snmp
 Checking task
 Checking vlun
 Checking vv
 Component
Also check if all connected host are not using 3PAR. Best way using command statvv

All looked OK so I proceeded with the shutdown.  You have 3 methods to shutdown SPmaint, SPOCC or via CLI.  I would recommend using SPmaint, or SPOCC  if possible.

SPOCC

1 Connect via web GUI to your Service Processor
2 Select SPmaint on the left hand menu
3 Choose StoreServ Product Maintenance

4 Choose halt a storeServ cluster/node
8-halt
5 Choose to shutdown the cluster, not the separate nodes
6 Wait about 5 minutes, then follow the hardware steps later in the post
CLI
You will need to logon with a local admin account
To begin the shutdown:
3PAR1% shutdownsys halt
You will See the following prompt
-----System Information------
 System Name   : 3PAR1
 System Model  : HP_3PAR 7200c
 Serial Number : 1666666

------------------Partial List Of Hosts-------------------
 Id Name       Persona       -WWN/iSCSI_Name- Port  IP_addr
 ANY HOSTS STIL CONNECTED LISTED HERE

Shutting down this storage system will impact applications running on the hosts displayed above

Do you REALLY want to HALT this storage system? yes or no:


The system will HALT in 12 seconds

Press the enter key to stop...

No tasks can be running such as Adaptive Optimization. Then follow the hardware steps in the following section.

HARDWARE STEPS

1 Wait aprox 5 mins for shut down
2 Check the node Status LED is flashing green and the node hotplug LED is blue
3 Turn off the node PCM switches at the back of the controller nodes. (Diagram borrowed from HP 3PAR StoreServ 7000 and 7000c Storage Service Guide)
4 Turn off the node PCM switches at the back of the disk shelves

POWER ON

3PAR will automatically turn its self back on when power is detected so you will just need turn the PCM switches back on.  The order is the reverse of power off:
1 Turn on the node PCM switches at the back of the disk shelves
2 Turn on the node PCM switches at the back of the controller nodes

It would of course be sensible to do a checkhealth after power up to check everything looked OK. If you found this useful you will be interested to see our selection of the best 3PAR posts selected from the 150 posts written on the topic within this blog.

How to use DiskSpd to simulate Veeam Backup & Replication disk actions

This HOW-TO contains information on how to use Microsoft© DiskSpd to simulate Veeam Backup & Replication disk actions to measure disk pe...